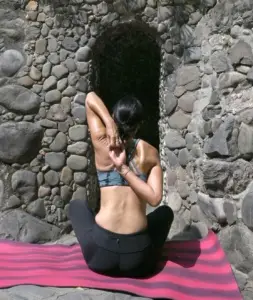
Pelvic floor dysfunctions, such as pelvic organ prolapse, urinary incontinence, or pelvic pain, can significantly impact daily life and overall well-being. Mindful-based practices offer a gentle and effective approach to strengthen and restore balance to the pelvic floor muscles. By practicing specific mindful poses, breathing techniques, and meditation techniques, individuals can improve pelvic floor function, alleviate symptoms, and enhance pelvic health.
Benefits of Pelvic Floor Dysfunctions Therapy:
- Muscle strength: Targets and tones pelvic floor muscles for better support.
- Flexibility: Improves range of motion and reduces tension in pelvic area.
- Mind-body connection: Enhances awareness of pelvic floor sensations and control.
- Stress reduction: Lowers cortisol levels and promotes relaxation.
- Improved circulation: Enhances blood flow to pelvic organs, supporting overall health.
Considerations before Starting:
- Consult with a healthcare provider or pelvic floor specialist to determine appropriate mindfulness practices.
- Choose gentle mindfulness practices that emphasize relaxation and mindful movement.
- Practice in a comfortable environment with minimal distractions.
- Listen to your body and modify poses as needed to avoid discomfort or strain.
Mindful Poses for Pelvic Floor Dysfunctions:
- Chair Pose
- Instructions:
- Stand with feet together, arms at sides.
- Inhale, raise arms overhead, palms facing each other.
- Exhale, bend knees, and lower hips as if sitting in an imaginary chair.
- Engage core muscles, lengthen spine, and hold for 30 seconds to 1 minute.
- Benefits:
- Strengthens pelvic floor, thighs, and core muscles.
- Improves posture and balance.
- Tips:
- Keep knees aligned over ankles, not extending beyond toes.
- Press firmly into heels to activate leg muscles and stabilize hips.
- Contraindications:
- Avoid if there is knee, hip, or lower back pain.
- Instructions:
- Garland Pose
- Instructions:
- Stand with feet slightly wider than hip-width apart, toes turned out slightly.
- Bend knees and lower hips towards the floor, keeping heels grounded.
- Bring palms together at heart center, elbows pressing against inner thighs.
- Lengthen spine, gaze forward, and hold for 30 seconds to 1 minute.
- Benefits:
- Strengthens pelvic floor muscles and inner thighs.
- Improves hip flexibility and range of motion.
- Tips:
- Use a folded blanket under heels if ankles are tight.
- Engage core muscles to support the lower back and pelvis.
- Contraindications:
- Avoid if there is knee or ankle pain or discomfort.
- Instructions:
- Bound Angle Pose
- Instructions:
- Sit on the mat, bend knees and bring soles of feet together, heels close to groin.
- Hold feet with hands, sit tall with spine straight.
- Inhale, lengthen spine; exhale, gently press knees towards the floor.
- Hold for 1-3 minutes, breathing deeply into the pelvis.
- Benefits:
- Stretches inner thighs and groin muscles.
- Opens hips and encourages relaxation in pelvic area.
- Tips:
- Use blocks or blankets under knees for support if hips are tight.
- Keep spine lengthened throughout the pose to avoid rounding.
- Contraindications:
- Avoid if there is recent hip or knee injury.
- Instructions:
- Bridge Pose
- Instructions:
- Lay on your back, bend knees, feet hip-width apart, arms by your sides.
- Press feet into the mat, lift hips towards the ceiling, interlace fingers under the back.
- Roll shoulders under, press upper arms into the mat, and lift chest towards chin.
- Hold for 30 seconds to 1 minute, breathing deeply.
- Benefits:
- Strengthens pelvic floor, glutes, and lower back muscles.
- Stretches chest and neck, improving posture.
- Tips:
- Keep thighs and feet parallel, avoiding outward rotation.
- Lift hips without squeezing buttocks excessively.
- Contraindications:
- Avoid if there is recent neck injury or discomfort.
- Instructions:
- Reclining Bound Angle Pose
- Instructions:
- Lay on your back, bend knees, bring soles of feet together, knees dropping to sides.
- Support knees with pillows or blankets if needed for comfort.
- Rest arms by your sides, palms facing up, close eyes, and breathe deeply.
- Hold for 3-5 minutes, focusing on relaxing the pelvic floor muscles.
- Benefits:
- Opens hips and stretches inner thighs.
- Relaxes pelvic floor and encourages deep relaxation.
- Tips:
- Use pillows or bolsters under knees for added support.
- Allow belly to rise and fall naturally with each breath.
- Contraindications:
- Avoid if there is discomfort in the lower back or hips.
- Instructions:
Breathing Exercises for Pelvic Floor Dysfunctions:
- Diaphragmatic Breathing
- Instructions:
- Lay on your back or sit comfortably with a tall spine.
- Place one hand on your chest and the other on your abdomen.
- Inhale deeply through your nose, feeling your abdomen rise (hand on abdomen rises higher than hand on chest).
- Exhale slowly through your mouth or nose, allowing abdomen to fall.
- Continue for several rounds, focusing on slow and steady breaths.
- Benefits:
- Strengthens diaphragm and promotes relaxation.
- Reduces tension in pelvic floor muscles and encourages optimal breathing patterns.
- Tips:
- Practice daily to enhance awareness of breath and pelvic floor coordination.
- Use this technique during mindfulness practice to support relaxation and muscle engagement.
- Contraindications:
- None, generally safe for most individuals.
- Instructions:
- Cooling Breath
- Instructions:
- Sit comfortably with a tall spine, lips parted, and tongue curled into a “U” shape.
- Inhale deeply through the rolled tongue or between the teeth, as if sipping through a straw.
- Close mouth, exhale slowly and completely through the nose.
- Repeat for several rounds, focusing on the cooling sensation of the breath.
- Benefits:
- Reduces tension and heat in the pelvic area.
- Calms the nervous system and promotes relaxation.
- Tips:
- Practice in a quiet, cool environment to enhance the cooling effect.
- Use this technique during times of stress or discomfort in the pelvic region.
- Contraindications:
- Avoid if there is difficulty with tongue or mouth movements.
- Instructions:
Mindful Practice for Pelvic Floor Dysfunctions:
- Body Scan Meditation
- Instructions:
- Lay down comfortably, close your eyes, and take a few deep breaths.
- Bring awareness to different parts of your body, starting from the toes up to the head.
- Notice any sensations, tension, or areas of comfort without judgment.
- Spend more time on areas that feel tense or uncomfortable, breathing into those spaces.
- Benefits:
- Promotes relaxation and reduces physical and mental tension.
- Increases body awareness and connection.
- Tips:
- Practice regularly, especially before or after mindfulness sessions to integrate relaxation and awareness.
- Use this technique to foster a compassionate attitude towards your body and its needs.
- Instructions:
Summary with Tips:
- Consistency: Practice mindfulness poses and breathing exercises regularly to strengthen pelvic floor muscles and improve overall pelvic health.
- Awareness: Listen to your body and modify poses as needed to avoid strain or discomfort.
- Hydration and diet: Maintain hydration and a balanced diet to support muscle function and overall well-being.
- Professional guidance: Consult with a healthcare provider or pelvic floor specialist for personalized advice and management.
- Mind-body connection: Use mindfulness and mindfulness practices to enhance awareness of pelvic sensations and promote relaxation.
By incorporating these mindful poses, breathing exercises, and meditation techniques into your routine, you can effectively strengthen and restore balance to the pelvic floor muscles. These practices offer a holistic approach to improving pelvic health, reducing symptoms of pelvic floor dysfunctions, and enhancing overall well-being.